
Process
Why refractory linings fail — reading the damage back to its cause
Steam spalling, thermal shock, laminations, voids, erosion, chemical attack and anchor failure — what each looks like, and which decision made on site during installation produced it.
Standards referencedAPI 936
Refractory linings rarely fail because the wrong material was specified. They fail because of decisions made on site — how much water went in, whether the gunning stopped, how fast the first heat-up ran, which anchors arrived in the box.
Reading damage backwards to the decision that caused it is most of what makes an experienced refractory inspector useful.
The damage and what it means
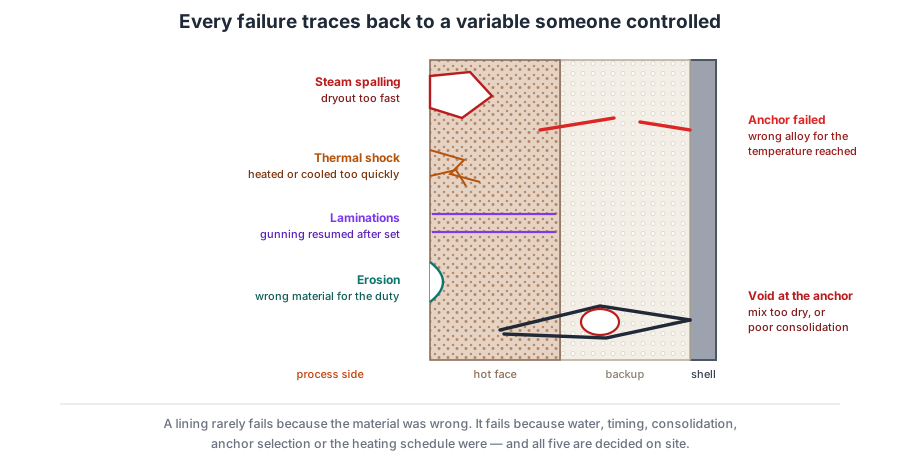
Steam spalling
Looks like: pieces of the hot face missing, often with sharp edges, appearing during or just after the first heat-up.
Caused by: water turning to steam faster than it can escape through the material, so internal pressure exceeds the refractory’s tensile strength.
Traces back to: the dryout schedule — rates too fast, hold points skipped or shortened, or thermocouples that reported a temperature the lining never actually saw. It can also trace back to curing, if the lining went into dryout wetter than it should have been.
The timing is the giveaway. Damage that appears before the unit has run is about installation and commissioning, not about service.
Thermal shock
Looks like: cracking, and over time loss of material at the surface, accumulating across start-ups and trips.
Caused by: temperature changing faster than the material can accommodate, so the hot face expands against colder material behind it.
Traces back to: operation as much as installation — but also to material selection, since thermal shock resistance is one of the four questions a material choice answers, and a strong dense material is not automatically the tough one.
Laminations
Looks like: flat separations parallel to the wall, often revealed when a piece comes away cleanly in a sheet rather than breaking irregularly.
Caused by: one pass of gunned material not bonding to the pass beneath it.
Traces back to a specific prohibited act: application interrupted and then resumed after initial set. The standard defines that point by the surface having been exposed too long or gone dry to the touch, and prohibits continuing past it precisely because this is the result.
Voids
Looks like: cavities inside the lining, very often concentrated around the anchors.
Caused by: material that did not flow or pack into place.
Traces back to: a mix too dry, insufficient vibration or ramming energy, or a form that prevented the material reaching. Anchors are the hardest place to fill because the material has to travel around an obstruction — which is exactly why a qualification panel is sectioned and examined for consolidation around the anchors before production work begins.
Erosion and abrasion
Looks like: smooth scooped thinning, worst where flow impinges or changes direction.
Caused by: moving solids or high-velocity gas wearing the surface away.
Traces back to: material selection against the duty, and to installed density — a correctly specified castable placed too wet is not the material that was specified.
Chemical attack
Looks like: discolouration, a softened or glassy surface layer, swelling, or material that crumbles when touched.
Caused by: alkalis, sulphur compounds, carbon monoxide or slag reacting with the refractory.
Traces back to: material selection against the actual process chemistry, which is one of the four selection questions — and to any change of feed or service that happened after the lining went in and was never reassessed.
Anchor failure
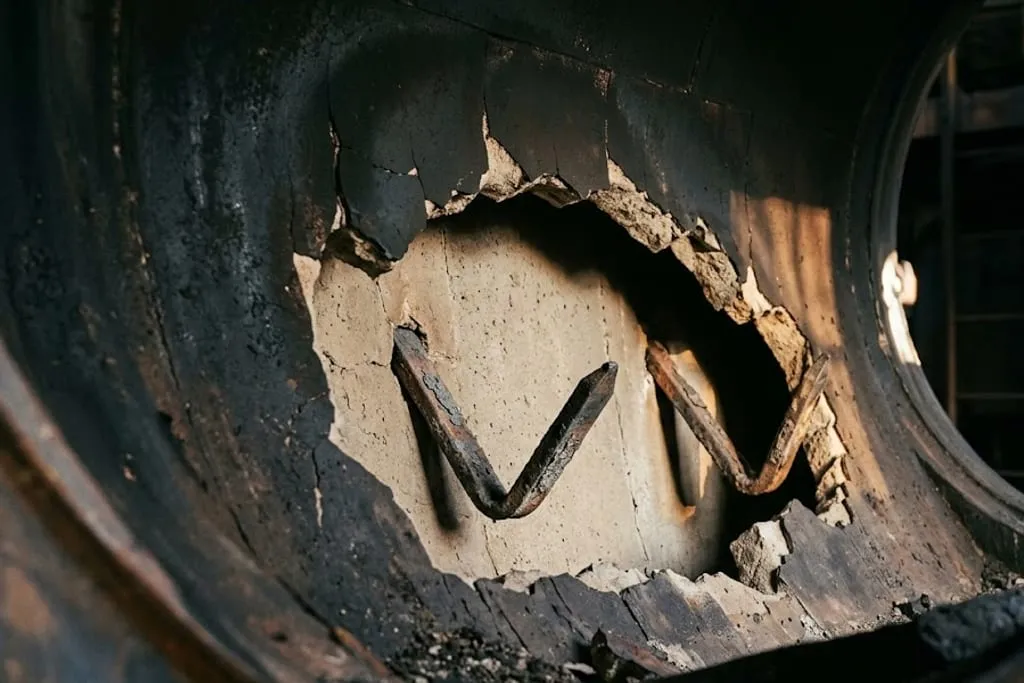
Looks like: anchors oxidised to stubs, bent, or detached at the weld, usually discovered only when the lining they were holding comes down.
Caused by: the anchor running hotter than its alloy can survive, or a weld that was never sound.
Traces back to: anchor material selection and traceability. An anchor reaches from a cool shell toward a hot face, so a lower alloy than specified survives happily near the shell and is consumed at its tip. This is the failure that anchor identification — stamping, laser etching, sealed traceable packaging, and positive material identification where those are missing — is designed to prevent.
Diagnosing in practice
Three questions get most of the way:
- When did it appear? Before the unit ran — installation, curing or dryout. After years of service — erosion, chemical attack, thermal cycling. Early in service — often a latent installation defect finally opening up.
- Where is it? Concentrated at anchors, at joints, at flow impingement points, at the hot face, or spread evenly? Each pattern points somewhere different.
- Was that area original work? The contractor’s record of repaired areas and field joints answers it, and it carries the reason, the means and the refractory used. A repair material that differs from the surrounding lining may have needed different curing and dryout, and an early failure in a repaired patch is a very different finding from one in original work.
Check your understanding
7 questions. Nothing is recorded — this is just for you.